Capturing the essence of architectural design requires more than just pointing a camera at a building. It demands a deliberate approach to composition, an understanding of light, and a mastery of technical execution. For photographers, agencies, and publishers looking to produce compelling visual content of structures, the goal is often twofold: to accurately represent the architect's vision and to create an image that resonates powerfully with an audience, whether for marketing, documentation, or artistic expression. This requires strategic choices about equipment, timing, and post-production, all aimed at translating three-dimensional space into a two-dimensional image that conveys scale, texture, and intent. The following tips detail critical considerations and techniques to elevate architectural photography from mere documentation to impactful visual storytelling.
Key Considerations for Architectural Photography
Before pressing the shutter, a strategic framework helps define the approach to architectural photography. This involves understanding the structure's purpose, identifying its key design elements, and considering the intended audience for the images. Effective architectural photography often hinges on meticulous planning and a clear vision for the final output. This includes scouting locations to assess light conditions, identifying optimal vantage points, and determining the best time of day to shoot. Technical considerations, such as lens choice and camera settings, are secondary to understanding the building itself and how its features interact with its environment. Prioritizing these foundational elements ensures that each photograph contributes meaningfully to a cohesive visual narrative, rather than serving as an isolated, uncontextualized shot.
1. Master Composition and Framing
Effective composition in architectural photography dictates how viewers perceive a structure's scale, form, and relationship to its surroundings. This involves deliberate placement of elements within the frame, utilizing principles like the rule of thirds, leading lines, and symmetry to guide the eye. A strong composition can transform a mundane building into a captivating subject, emphasizing its unique features or its integration into the landscape. It requires an understanding of how different angles and perspectives alter perception, allowing the photographer to highlight specific architectural details or convey the overall grandeur of a design.
Best For: Photographers aiming to convey architectural intent and scale effectively without relying solely on specialized gear. It's fundamental for creating visually balanced and engaging images that communicate the design's core message.
Pros: Elevates aesthetic impact without requiring significant equipment investment; provides a foundational skill applicable across all photography genres; enhances the narrative quality of images by directing viewer attention.
Cons: Requires practice and a developed artistic eye; initial results may feel forced or unnatural without a deep understanding of compositional principles; can be challenging to apply consistently in complex architectural environments.
Verdict: Essential for any architecture photographer, as strong composition dictates how a viewer perceives the structure's design and presence. Mastering this skill directly impacts the professional quality and communicative power of the final image.
2. Understand and Utilize Natural Light
Natural light is a primary tool for architectural photographers, capable of defining form, texture, and mood. Its quality, direction, and intensity change throughout the day and with weather conditions, dramatically altering how a building appears. Understanding how light interacts with different materials—glass, concrete, brick—allows photographers to choose optimal shooting times. Side lighting, for instance, can accentuate textures and create depth, while front lighting might flatten a facade but reveal true colors. Backlighting can produce dramatic silhouettes or glowing edges, depending on the subject and desired effect. The strategic use of natural light ensures that the building's architectural details are revealed, not obscured, by shadows or harsh reflections.
Best For: Photographers prioritizing authenticity and natural aesthetics in their architectural imagery, particularly for exteriors and well-lit interiors. It's crucial for revealing material properties and structural depth.
Pros: Produces a natural, authentic look; enhances textures and forms organically; often requires less additional lighting equipment, simplifying setup.
Cons: Highly dependent on weather and time of day, requiring flexibility and patience; can be challenging to control or replicate consistently; harsh midday light often produces unflattering results.
Verdict: A fundamental aspect of architectural photography, effective natural light management can distinguish professional-grade work. Prioritize scouting locations at different times to observe light patterns and plan shoots accordingly.
3. Leverage the Golden and Blue Hours
The golden hour, immediately after sunrise and before sunset, and the blue hour, just before sunrise and after sunset, offer distinct lighting conditions highly prized in architectural photography. Golden hour light is soft, warm, and creates long shadows that emphasize three-dimensionality and texture, lending a dramatic and inviting quality to buildings. Blue hour, conversely, provides a cooler, more ethereal light that can make artificial lights within or on a building glow with contrast. These periods provide unique opportunities to capture a building's character, creating images that are often more evocative and visually striking than those taken under midday sun. Planning shoots around these specific times is a common strategy for achieving high-impact results.
Best For: Creating visually dramatic and emotionally resonant architectural photographs, particularly for exteriors and urban landscapes where ambient light interacts with artificial illumination.
Pros: Produces unique, flattering light that enhances architectural forms; offers a distinct aesthetic that often stands out; minimizes harsh shadows and blown-out highlights common at other times of day.
Cons: Limited time window for shooting, requiring precise planning and quick execution; weather conditions can significantly impact light quality during these brief periods; may require bracketing exposures to capture full dynamic range.
Verdict: Essential for capturing a building's most flattering and atmospheric presentation. Integrating golden and blue hour shoots into a project plan significantly increases the potential for standout imagery, justifying the logistical challenges.
4. Correct Perspective and Distortion
Architectural photography often faces challenges with perspective distortion, where vertical lines appear to converge due to the camera's angle relative to the building. Correcting this is crucial for maintaining the integrity of architectural design and presenting structures accurately. Tilt-shift lenses are specifically designed to control perspective and focus, allowing the photographer to shift the lens plane relative to the sensor, thereby keeping lines parallel. Without such specialized lenses, careful camera positioning (e.g., shooting from a distance with a longer lens) and post-processing techniques (using perspective correction tools in software) become vital. Achieving perfectly straight lines and accurate proportions is a hallmark of professional architectural photography.
Best For: Ensuring accurate representation of architectural designs, crucial for client work, documentation, and situations where geometric precision is paramount. It addresses a fundamental technical challenge in the field.
Pros: Maintains the integrity of architectural lines and proportions; enhances the professional appearance of images; prevents distracting visual anomalies that can detract from the subject.
Cons: Requires specialized equipment (tilt-shift lenses) or significant post-processing effort; can be time-consuming to achieve perfect correction, especially with complex structures; incorrect application can introduce new distortions.
Verdict: A non-negotiable technical skill for serious architectural photographers. Whether through specialized lenses or meticulous post-processing, ensuring accurate perspective is critical for delivering credible and high-quality results.
5. Pay Attention to Details and Textures
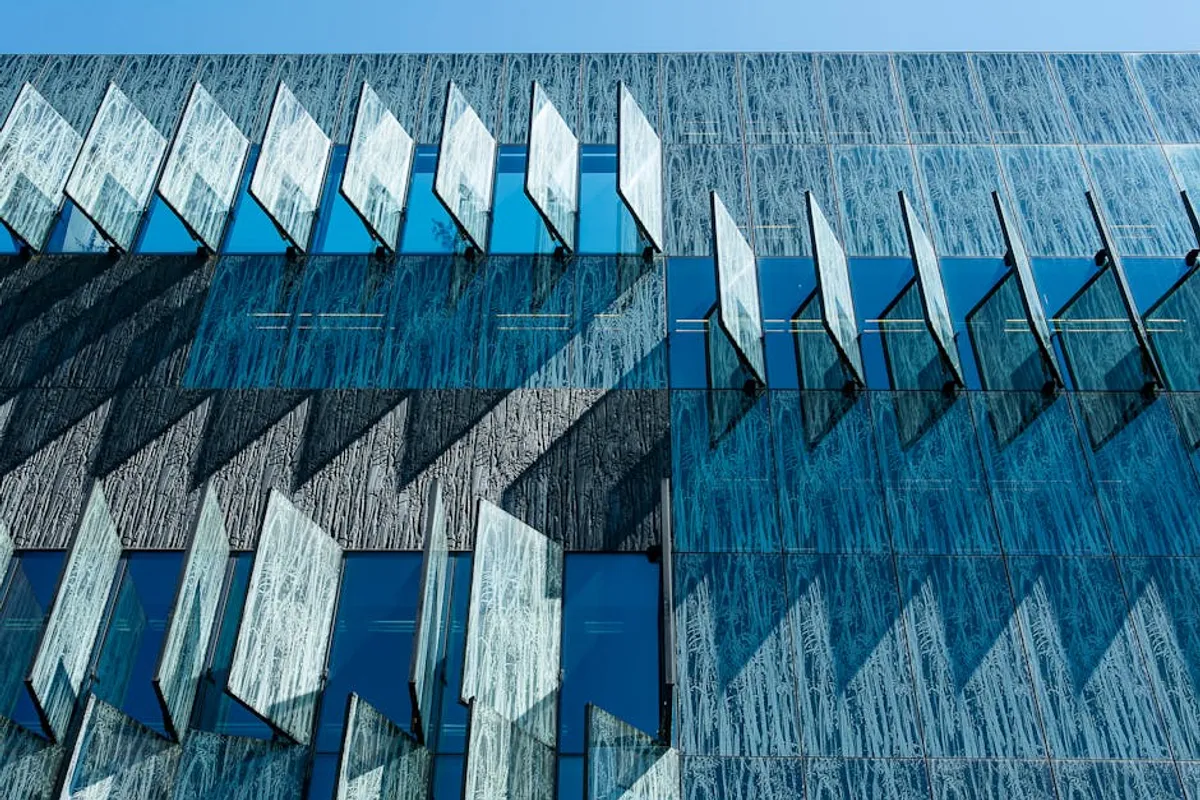
Beyond the grand facade, architectural details and material textures often convey the true character and craftsmanship of a building. Zooming in on intricate carvings, unique window designs, or the tactile quality of concrete, wood, or glass can add depth and narrative to a photographic series. These close-up shots provide context, highlight the architect's material choices, and offer a different perspective on the overall design. Capturing these elements requires a keen eye for subtle features, precise focusing, and an understanding of how light interacts with surfaces to reveal their inherent qualities. Incorporating both wide and detailed shots creates a comprehensive visual story of a structure.
Best For: Adding depth, context, and a sense of craftsmanship to architectural portfolios. It caters to clients who value the finer points of design and material selection.
Pros: Reveals the unique character and quality of materials; provides additional visual interest and narrative elements; allows for a more comprehensive documentation of a building's design.
Cons: Requires careful composition and precise focusing for each detail shot; can be time-consuming to capture a wide array of details; risks losing the overall context if not balanced with wider shots.
Verdict: Essential for a complete architectural photography project. Detail shots complement broader views by showcasing the thought and execution behind a building's design, appealing to a discerning audience.
6. Scout Locations and Plan Your Shots
Effective architectural photography often begins long before the camera is even unpacked. Location scouting involves visiting the site at different times of day to observe light patterns, identify potential obstructions, and discover unique vantage points. This reconnaissance helps in planning the optimal time for the shoot, anticipating weather changes, and pre-visualizing compositions. A well-planned shoot minimizes on-site delays and ensures that critical moments of light or activity are not missed. This proactive approach allows photographers to develop a shot list, select appropriate gear in advance, and address logistical challenges, leading to a more efficient and successful session.
Best For: Maximizing efficiency and ensuring optimal conditions for every shot, particularly for large-scale projects or those with specific lighting requirements. It's the foundation of a professional workflow.
Pros: Reduces on-site guesswork and wasted time; allows for strategic planning of light, angles, and gear; helps identify and overcome potential logistical challenges before the shoot.
Cons: Requires additional time investment prior to the actual shoot; may not always be feasible for distant or time-sensitive projects; unexpected changes in weather or site conditions can still occur.
Verdict: Indispensable for high-quality architectural photography. Thorough scouting and planning are directly correlated with the quality and consistency of the final images, making it a critical step for professional results.
7. Use the Right Gear (Lenses, Tripods)
While skill is paramount, appropriate gear facilitates the execution of architectural photography techniques. Wide-angle lenses (e.g., 16-35mm on full-frame) are standard for capturing expansive facades and interiors, but care must be taken to minimize distortion. Telephoto lenses (e.g., 70-200mm) can compress perspective, isolate details, or capture distant elements. Tilt-shift lenses, as mentioned, are specialized for perspective control. A sturdy tripod is non-negotiable for sharp images, especially in low light or when bracketing exposures. Remote shutters minimize camera shake. Investing in quality optics and stabilization tools directly contributes to image sharpness, technical accuracy, and overall professional presentation.
Best For: Achieving technical precision, sharpness, and versatility in capturing various architectural aspects, from sweeping exteriors to intricate details. It's about enabling specific creative and technical solutions.
Pros: Enhances image sharpness and detail; provides versatility for different compositional needs; specialized lenses (e.g., tilt-shift) solve specific perspective challenges; tripods enable long exposures and precise framing.
Cons: Significant financial investment; increased weight and bulk to carry; requires understanding of each piece of equipment's specific application and limitations.
Verdict: While not a substitute for skill, the right gear is an enabler. Prioritize a versatile set of lenses and a robust tripod to address the unique demands of architectural subjects and achieve consistently high-quality results.
8. Incorporate Human Elements Thoughtfully
Including people in architectural photographs can add a sense of scale, activity, and human connection to a building, making the images more relatable and dynamic. However, this must be done thoughtfully to avoid distracting from the architecture itself. Figures can be used to demonstrate how a space is used, highlight circulation paths, or simply provide a sense of scale against a large structure. The key is to ensure that any human element complements, rather than competes with, the architectural subject. This might involve using blurred figures to convey movement, placing individuals strategically within the frame, or capturing candid interactions that speak to the building's purpose. When done well, human elements can significantly enhance the narrative and appeal of architectural photography.
Best For: Adding scale, context, and a sense of life to architectural images, particularly for commercial or editorial purposes where relatability and human interaction with space are important.
Pros: Introduces scale and a sense of activity; makes images more relatable and engaging for viewers; helps convey the intended use and atmosphere of a space.
Cons: Risks distracting from the primary architectural subject if not carefully composed; requires managing subjects (if posed) or patience (if candid); can introduce legal or privacy considerations.
Verdict: A powerful tool for enhancing architectural narratives, but requires careful consideration. Integrate human elements when they clearly serve the image's purpose and add value to the architectural story, rather than just filling space.
9. Post-Processing for Impact
Post-processing is an integral stage in architectural photography, refining raw captures into polished, impactful images. This involves correcting lens distortions, adjusting perspective, managing dynamic range through exposure blending or HDR techniques, and fine-tuning colors and contrast. Software tools allow for precise control over these elements, enhancing details, removing distractions, and ensuring that the final image accurately represents the architect's vision while achieving a professional aesthetic. The goal is not to create an artificial reality, but to optimize the visual information captured by the camera, bringing out the best in the architecture and ensuring technical perfection.
Best For: Elevating raw captures to professional-grade images, ensuring technical accuracy, visual impact, and consistency across a project. It's critical for correcting optical imperfections and optimizing visual appeal.
Pros: Corrects lens distortions and perspective issues; enhances dynamic range and detail; allows for precise color and contrast adjustments; removes distracting elements for a cleaner image.
Cons: Requires proficiency with specialized software; can be time-consuming, especially for complex adjustments; over-processing can lead to an unnatural or artificial look that detracts from authenticity.
Verdict: An indispensable final step in the architectural photography workflow. Mastering post-processing techniques ensures that every image meets professional standards for clarity, accuracy, and aesthetic appeal, directly impacting client satisfaction and portfolio strength.
10. Experiment with Angles and Vantage Points
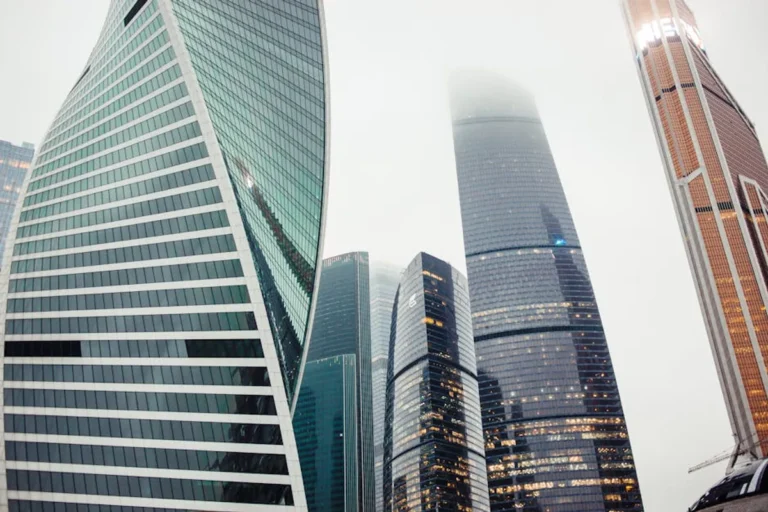
Moving beyond eye-level shots and conventional angles can reveal new dimensions of a building. Experimenting with low angles can emphasize height and grandeur, while high vantage points (from drones, adjacent buildings, or elevated platforms) offer unique perspectives on rooflines, urban integration, and overall site planning. Shooting from within a building, looking out, can frame the exterior within an interior context. The goal is to explore how different viewpoints alter the perception of space, form, and scale. This creative exploration often uncovers unexpected compositions that highlight specific design features or tell a more compelling story about the structure's relationship to its environment.
Best For: Discovering unique and dynamic perspectives of architectural subjects, differentiating images from standard representations, and highlighting specific design elements that might be overlooked from conventional viewpoints.
Pros: Generates fresh and engaging compositions; reveals hidden aspects of a building's design; can create a stronger sense of drama or scale; offers versatility for diverse client needs.
Cons: May require specialized equipment (e.g., drones, ladders) or access; some angles might introduce challenging lighting or perspective distortions; can be time-consuming to find truly unique and effective vantage points.
Verdict: Crucial for adding variety and artistic flair to architectural photography. Actively seeking out unconventional angles can transform routine documentation into compelling visual art, enhancing a photographer's creative reputation.
11. Focus on Storytelling and Context
A series of architectural photographs should ideally tell a story about the building, its purpose, and its place in the world. This involves more than just individual shots; it's about creating a cohesive narrative. Consider the building's environment—urban, rural, historical—and how it interacts with its surroundings. Show how people use the space, if appropriate. Include shots that establish context, such as the approach to the building, its relationship to neighboring structures, or its presence within a landscape. This holistic approach ensures that the photographs collectively communicate the full scope and intent of the architectural project, adding layers of meaning beyond mere visual representation.
Best For: Projects requiring a comprehensive visual narrative, such as architectural portfolios, editorial features, or marketing materials that aim to convey the full impact and purpose of a structure.
Pros: Creates a more engaging and memorable visual experience; provides deeper insight into the building's design and function; increases the utility of images for diverse communication purposes.
Cons: Requires a broader vision and more planning than individual shot execution; can be challenging to maintain narrative coherence across a large number of images; risks becoming overly documentary if not balanced with strong aesthetics.
Verdict: Elevates architectural photography from mere documentation to a powerful communication tool. Prioritizing storytelling ensures that images not only show a building but explain its significance and impact, making them invaluable for clients.
12. Shoot in RAW for Maximum Flexibility
Capturing images in RAW format is a critical practice for professional architectural photography. Unlike JPEG, which compresses and processes image data in-camera, RAW files retain all the information captured by the camera's sensor. This provides significantly more flexibility during post-processing for adjustments to exposure, white balance, shadows, highlights, and color. For architectural subjects, where precise control over light, detail, and color accuracy is paramount, RAW files allow for extensive non-destructive editing. This ensures that the final image can be finely tuned to meet specific client requirements or artistic visions without compromising image quality, offering a wider dynamic range and greater detail recovery capabilities.
Best For: Photographers who require maximum control over image quality and post-processing flexibility, ensuring the highest fidelity and adaptability for client deliverables and demanding artistic projects.
Pros: Retains maximum image data for extensive post-processing; offers superior dynamic range and color depth; allows for significant correction of exposure and white balance errors; non-destructive editing workflow.
Cons: Larger file sizes require more storage space; necessitates post-processing software; RAW files are not immediately viewable or shareable without conversion.
Verdict: An essential technical choice for any serious architectural photographer. The benefits of RAW capture in terms of image quality and editing flexibility far outweigh the minor inconveniences, directly contributing to professional-grade output.
Choosing the Right Approach for Your Architectural Photography Goals
Selecting the most effective architectural photography techniques depends directly on the project's objectives. For a developer showcasing a new property, emphasis might be on wide, inviting shots during golden hour, highlighting amenities and scale. An architect documenting a portfolio piece might prioritize precise perspective correction and detailed material shots. Publishers often seek images that tell a story, incorporating human elements or unique angles that convey the building's cultural or urban impact. Evaluate the primary purpose of the images: are they for marketing, artistic expression, historical documentation, or technical review? This clarity dictates the selection of gear, the timing of shoots, and the focus during post-processing. A flexible approach, combining several of these tips, generally yields the most comprehensive and impactful results, ensuring the visual assets align perfectly with strategic communication goals.
Frequently Asked Questions
What is the most important piece of gear for architectural photography?
While a sturdy tripod is crucial for sharpness and low-light work, a high-quality wide-angle lens (typically 16-35mm equivalent on full-frame) is arguably the most important for capturing the breadth of architectural subjects. For advanced users, a tilt-shift lens offers unparalleled perspective control.
How do I deal with harsh sunlight in architectural photography?
Harsh midday sun often creates strong contrasts and unflattering shadows. The best approach is to avoid shooting during these hours. Instead, plan shoots for the golden or blue hours. If unavoidable, use exposure bracketing and HDR techniques in post-processing to manage the dynamic range, or seek shade to soften the light.
Should I always include people in my architectural photos?
Not always. Including people can add scale and a sense of life, making the building more relatable. However, they can also distract from the architecture. Decide based on the project's goal: if the intent is to showcase the building's interaction with users or its liveliness, include them thoughtfully. If the focus is purely on the structure's form and materials, it's often better to exclude them.
What is the difference between architectural photography and real estate photography?
While both photograph buildings, architectural photography